I really shouldn't spend so much time on Pinterest, especially this close to Christmas when I have literally no time spare whatsoever. However, there I was, in the freezing cold garden at 8pm spray painting a plastic tap because I've decided my 18-month-old daughter absolutely must have a play kitchen for Christmas.
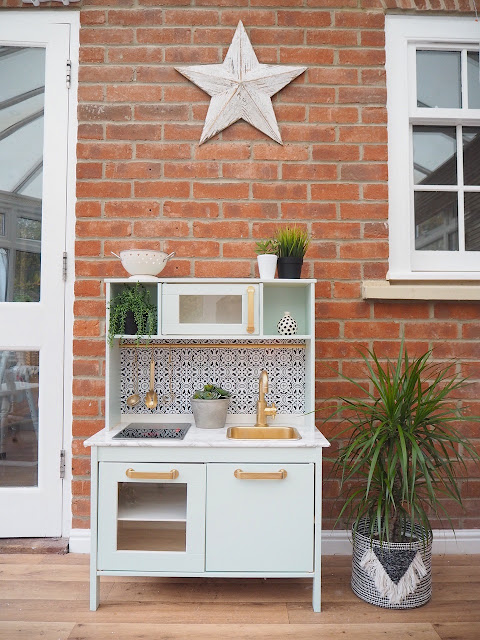
So in case anyone else is crazy enough to do the same - here's exactly how I made over the famous IKEA Duktig play kitchen, including the budget-friendly bits I used and how I transformed a plain wooden toy into something a bit more fitting for Dove Cottage!
The Duktig play kitchen from IKEA is really great quality, and actually looks fine untouched, however obviously I wanted to put my own stamp on it (well I can't have my dream kitchen, but little lady can!)
You will need:
IKEA Duktig play kitchen
Spray paint primer - I used Rustoleum Surface Primer
Spray paint - I used Rustoleum Gold Metallic spray paint
Wood primer - Homebase, £5
Paint - I used Wood & Metal paint in the shade 'Healthy, Wealthy & Wise' by Valspar
Tile stickers - Mine were from Amazon (similar design here)
Sheet of mdf for backsplash - I picked mine up from B&Q for £4.25
Sticky-back plastic - Mine was from Wilko and cost £4.00
Paintbrush/small roller
Hammer and nails
How I transformed the IKEA Duktig play kitchen
I started by putting together the bottom half of the kitchen, and then painting it as I thought this might be easier than painting all the bits first. I primed it first with a wood primer, a nice and cheap one I picked up in Homebase for just £5.I then painted all the wooden parts with Valspar Wood & Metal Paint in the shade Healthy, Wealthy & Wise - a beautiful minty green shade which I thought would work well with the gold and black. It needed two coats though, so bear that in mind.
For the plastic parts however (the pole, sink, taps, feet, door handles and the utensils I also picked up in IKEA) I used spray paint - priming them first with Rustoleum Surface Primer, before applying two coats of Rustoleum Gold Metallic Spray Paint (both of which I picked up at B&Q).
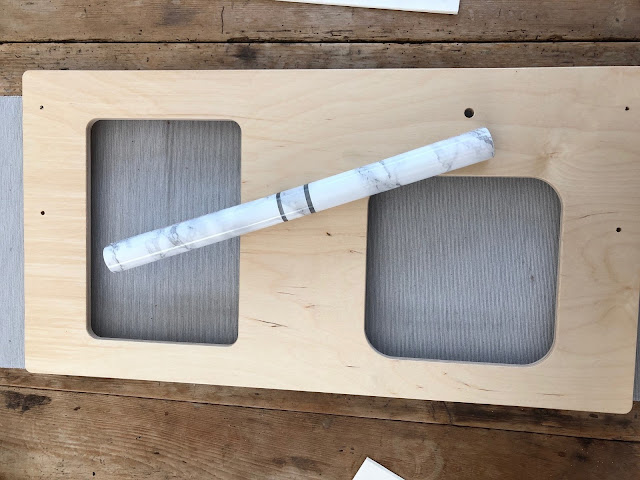
Next I covered the worktop part with some marble-effect sticky back plastic I found for just £4 in Wilko. I thought this might be a bit tricky to apply but it was actually not too difficult at all - just make sure to take it slow, and push out any air bubbles as you go along. You'll then need to cut the holes for the sink and hob to drop in.
I was then able to put the rest of the kitchen together before touching up any parts that perhaps needed it.
Finally, I wanted to create a splash back to give the kitchen the wow factor, however the back of the kitchen is open so I needed to nail a piece of mdf onto the back of the kitchen. The exact measurements you'll need is 33cm x 68cm, and I picked up a piece of mdf from B&Q for just £4.25 - I did need to saw a small piece off the end though, but I believe they can cut in-store for you if you don't have a hand saw at home.
Then came the tricky part (during which I uttered the words 'I'm never upcycling anything again') - I added some tile stickers to the mdf. I picked up these ones from Amazon, they're 10cm x 10cm each and came as a set of 24, however there was loads of different ones on eBay and Etsy too, or you could even stencil your own? They were quite tricky to line up, however we got there in the end! I gave the mdf two coats of white paint first, to give it a nicer base colour.
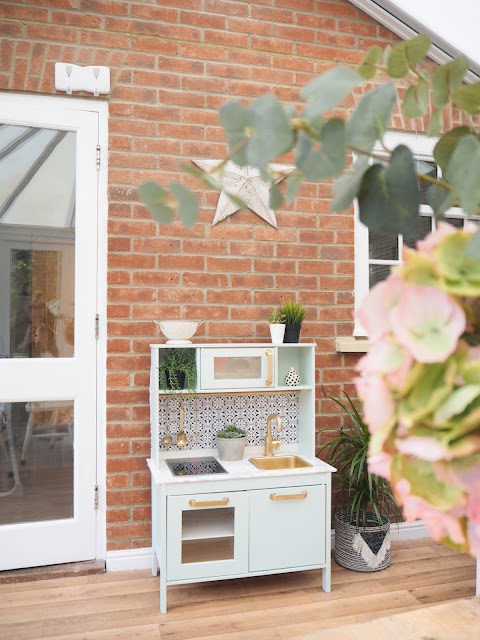
And there you have it! I've popped some artificial plants (all also from IKEA) and the mini colander was from Next a couple of years ago. I just hope little lady plays with it now (or maybe I don't want her to touch it!...)
Let me know if you have any questions, and of course tag me in your photos over on Instagram (@dove_cottage) if you decide to have a go yourself!
Thanks for reading,
Sam Xx
 |
| Yes I am using a puppy pad as a dust sheet... |
Next I covered the worktop part with some marble-effect sticky back plastic I found for just £4 in Wilko. I thought this might be a bit tricky to apply but it was actually not too difficult at all - just make sure to take it slow, and push out any air bubbles as you go along. You'll then need to cut the holes for the sink and hob to drop in.
I was then able to put the rest of the kitchen together before touching up any parts that perhaps needed it.
Finally, I wanted to create a splash back to give the kitchen the wow factor, however the back of the kitchen is open so I needed to nail a piece of mdf onto the back of the kitchen. The exact measurements you'll need is 33cm x 68cm, and I picked up a piece of mdf from B&Q for just £4.25 - I did need to saw a small piece off the end though, but I believe they can cut in-store for you if you don't have a hand saw at home.
Then came the tricky part (during which I uttered the words 'I'm never upcycling anything again') - I added some tile stickers to the mdf. I picked up these ones from Amazon, they're 10cm x 10cm each and came as a set of 24, however there was loads of different ones on eBay and Etsy too, or you could even stencil your own? They were quite tricky to line up, however we got there in the end! I gave the mdf two coats of white paint first, to give it a nicer base colour.
 |
| I left a strip at the bottom of the splash back to look like a trim (however in reality its because it saved me buying another pack of stickers!) |
And there you have it! I've popped some artificial plants (all also from IKEA) and the mini colander was from Next a couple of years ago. I just hope little lady plays with it now (or maybe I don't want her to touch it!...)
Let me know if you have any questions, and of course tag me in your photos over on Instagram (@dove_cottage) if you decide to have a go yourself!
Thanks for reading,
Sam Xx
*The paint I used for this project in the shade 'Healthy, Wealthy & Wise' was kindly gifted to me by Valspar*


Brilliant. Absolutely love how you have breathed real sense of luxury into this little kitchen unit piece.
ReplyDeleteThank you so much!
DeleteI love a good DIY and this is super cute!! That kitchen looks amazing, you did such a great job!! My niece would absolutely love this!
ReplyDeleteLove it so much. So amazing! And a kids toy that will look great in your home. You could offer a service and do this for people...
ReplyDeleteAh thank you so much!
DeleteLove this jist sent it to my sister as she's looking to do this for my niece
ReplyDeleteOh thank you so much! Hope it went well.
DeleteCan I ask how did you attach the mdf to the kitchen? Did you glue or drill it? I've been using this as my guide and inspiration.. got all the materials and starting over the weekend x
ReplyDeleteHow did you do the worktop so neatly and then cut out the sink and hob space? Thanks. Looks great !!
ReplyDeleteHi! Did u buy the cooking utensils or did u paint them gold as well :-) love it btw thanks for the inspiration :-)
ReplyDelete