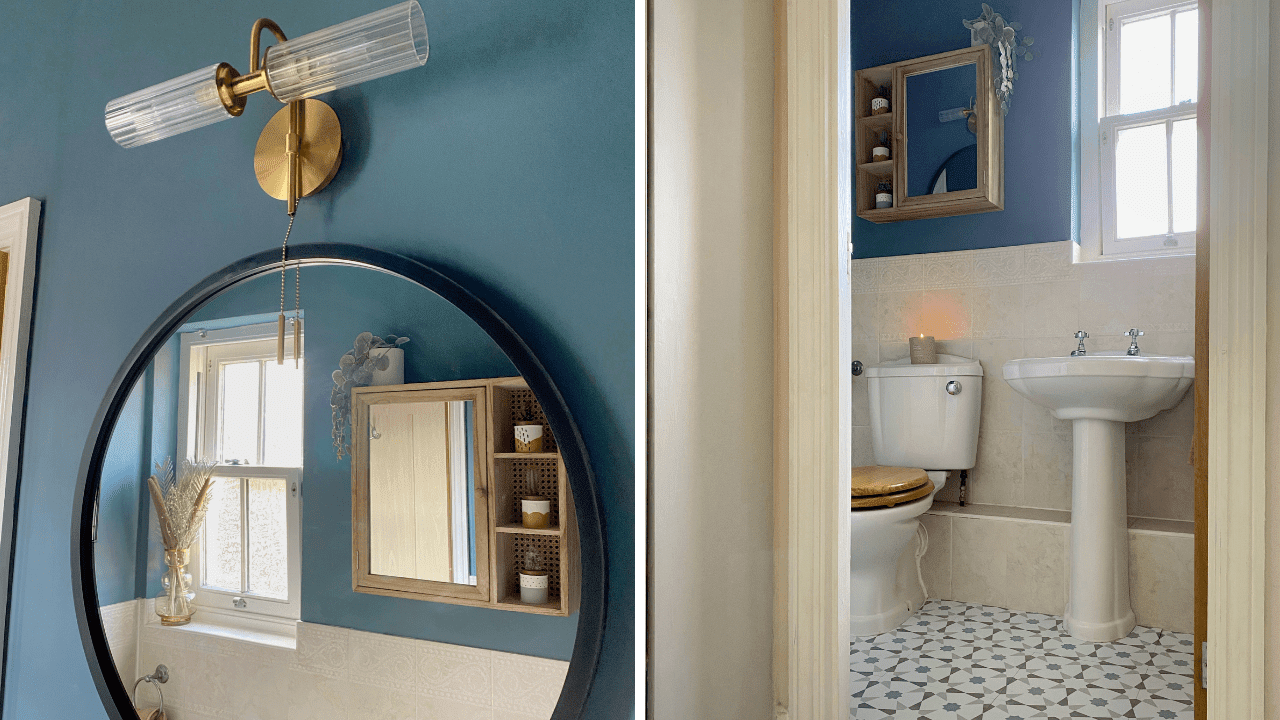
The dull, boring before look
So what better time to finally have a go at revamping this space than when I’m heavily pregnant?! Blame nesting being in full swing…
I had a budget of just £100, and wanted to prove that you don’t need to be able to rip everything out to make a big difference - sometimes all you need is a can of paint, some vinyl floor tiles and a couple of new accessories. I did go over slightly here, by £34, however you could definitely cut some more costs by shopping around for your accessories and looking on sites such as eBay and Facebook Marketplace for bargains - I often see the vinyl tiles on sites such as those.
How much I spent
Self-adhesive vinyl floor tiles - I only needed two packs of Floor Pops in the Stellar pattern, which came to £25.98 in total from Amazon, however they are also available from places such as Dunelm (*Aff link) and HomebasePaint - I've gone for 'Forest Waters' by Valspar, colour matched from Decorating Centre Online (I buy all my paint through them and would highly recommend!) This cost £14.49 for a one litre can
Prints - These were from Posterstore.co.uk and cost just £12.34 in total (after finding an epic discount code for an online print store!) The green arch poster in 30x40cm, and the leaf shape and scribble prints are in A4. I re-used some frames I already had to save more pennies
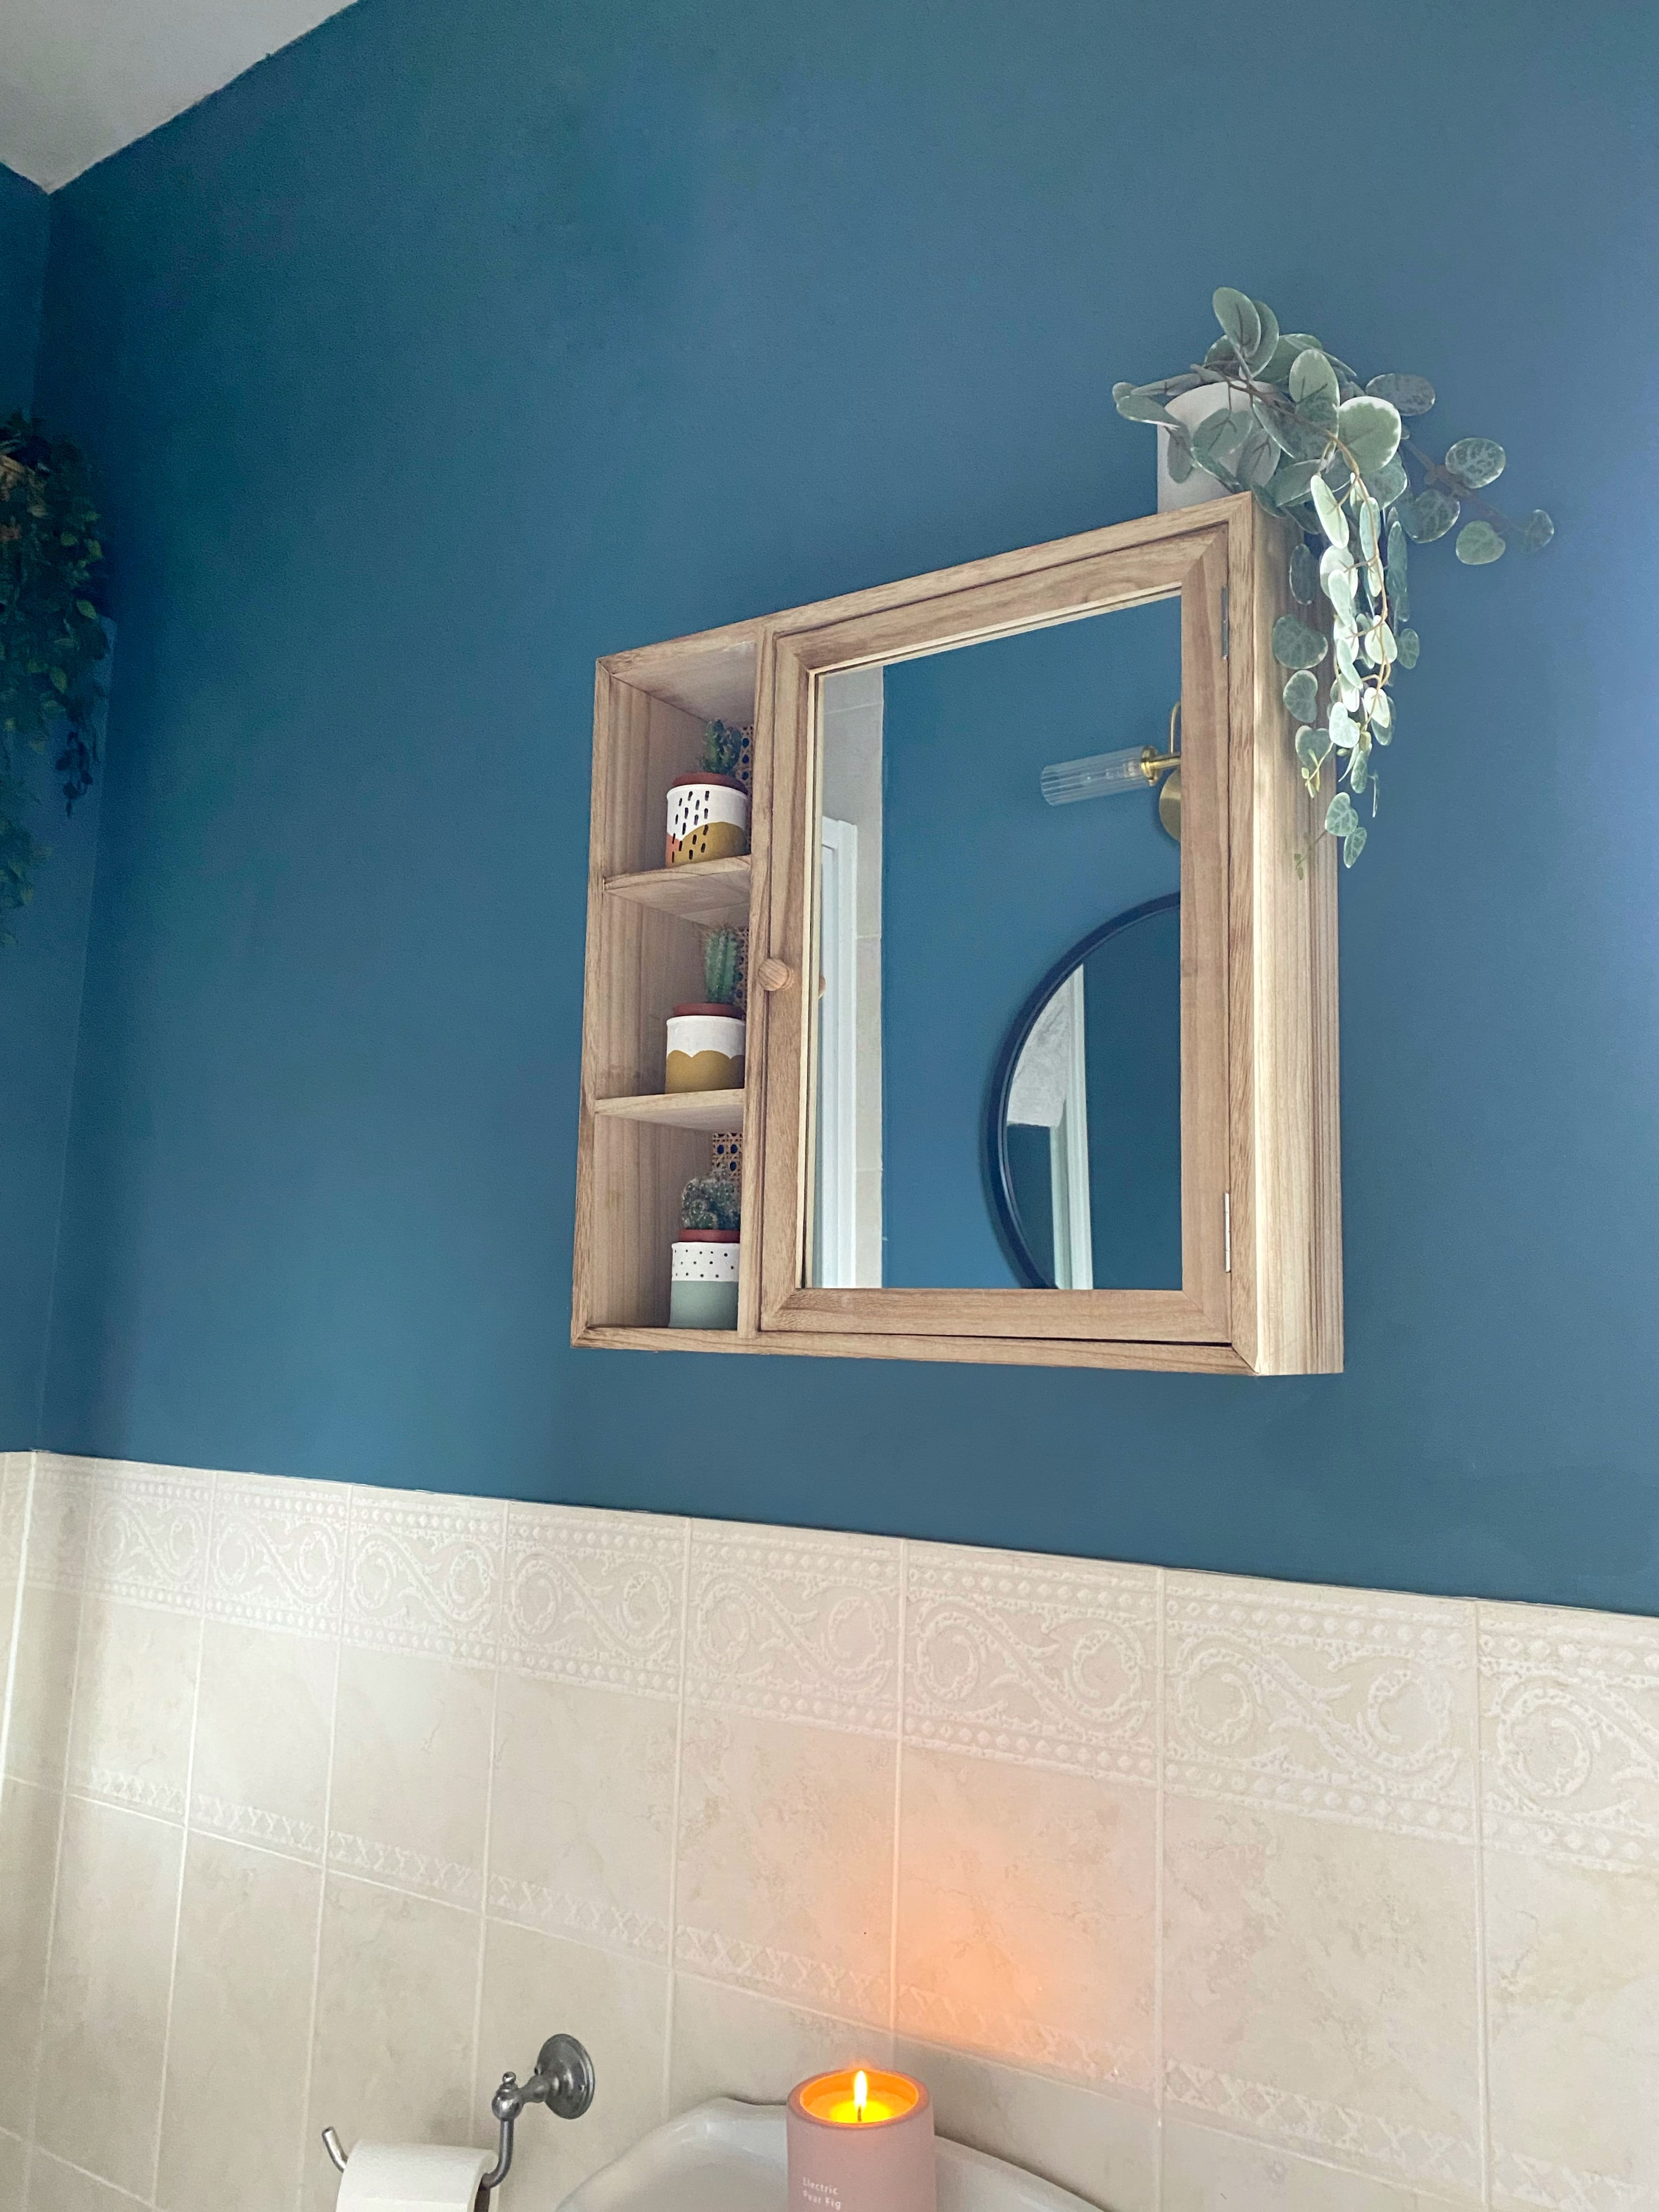
Cabinet - French Cane Mirror Cabinet from Dunelm*, and again using a discount code meaning I got this for £47.60
Light - Bathroom Wall Light*, again Dunelm using the same discount code for £34
Accessories - everything else was either bits I already had, or I made myself (more details below)
Total spend: £134.41
What I did
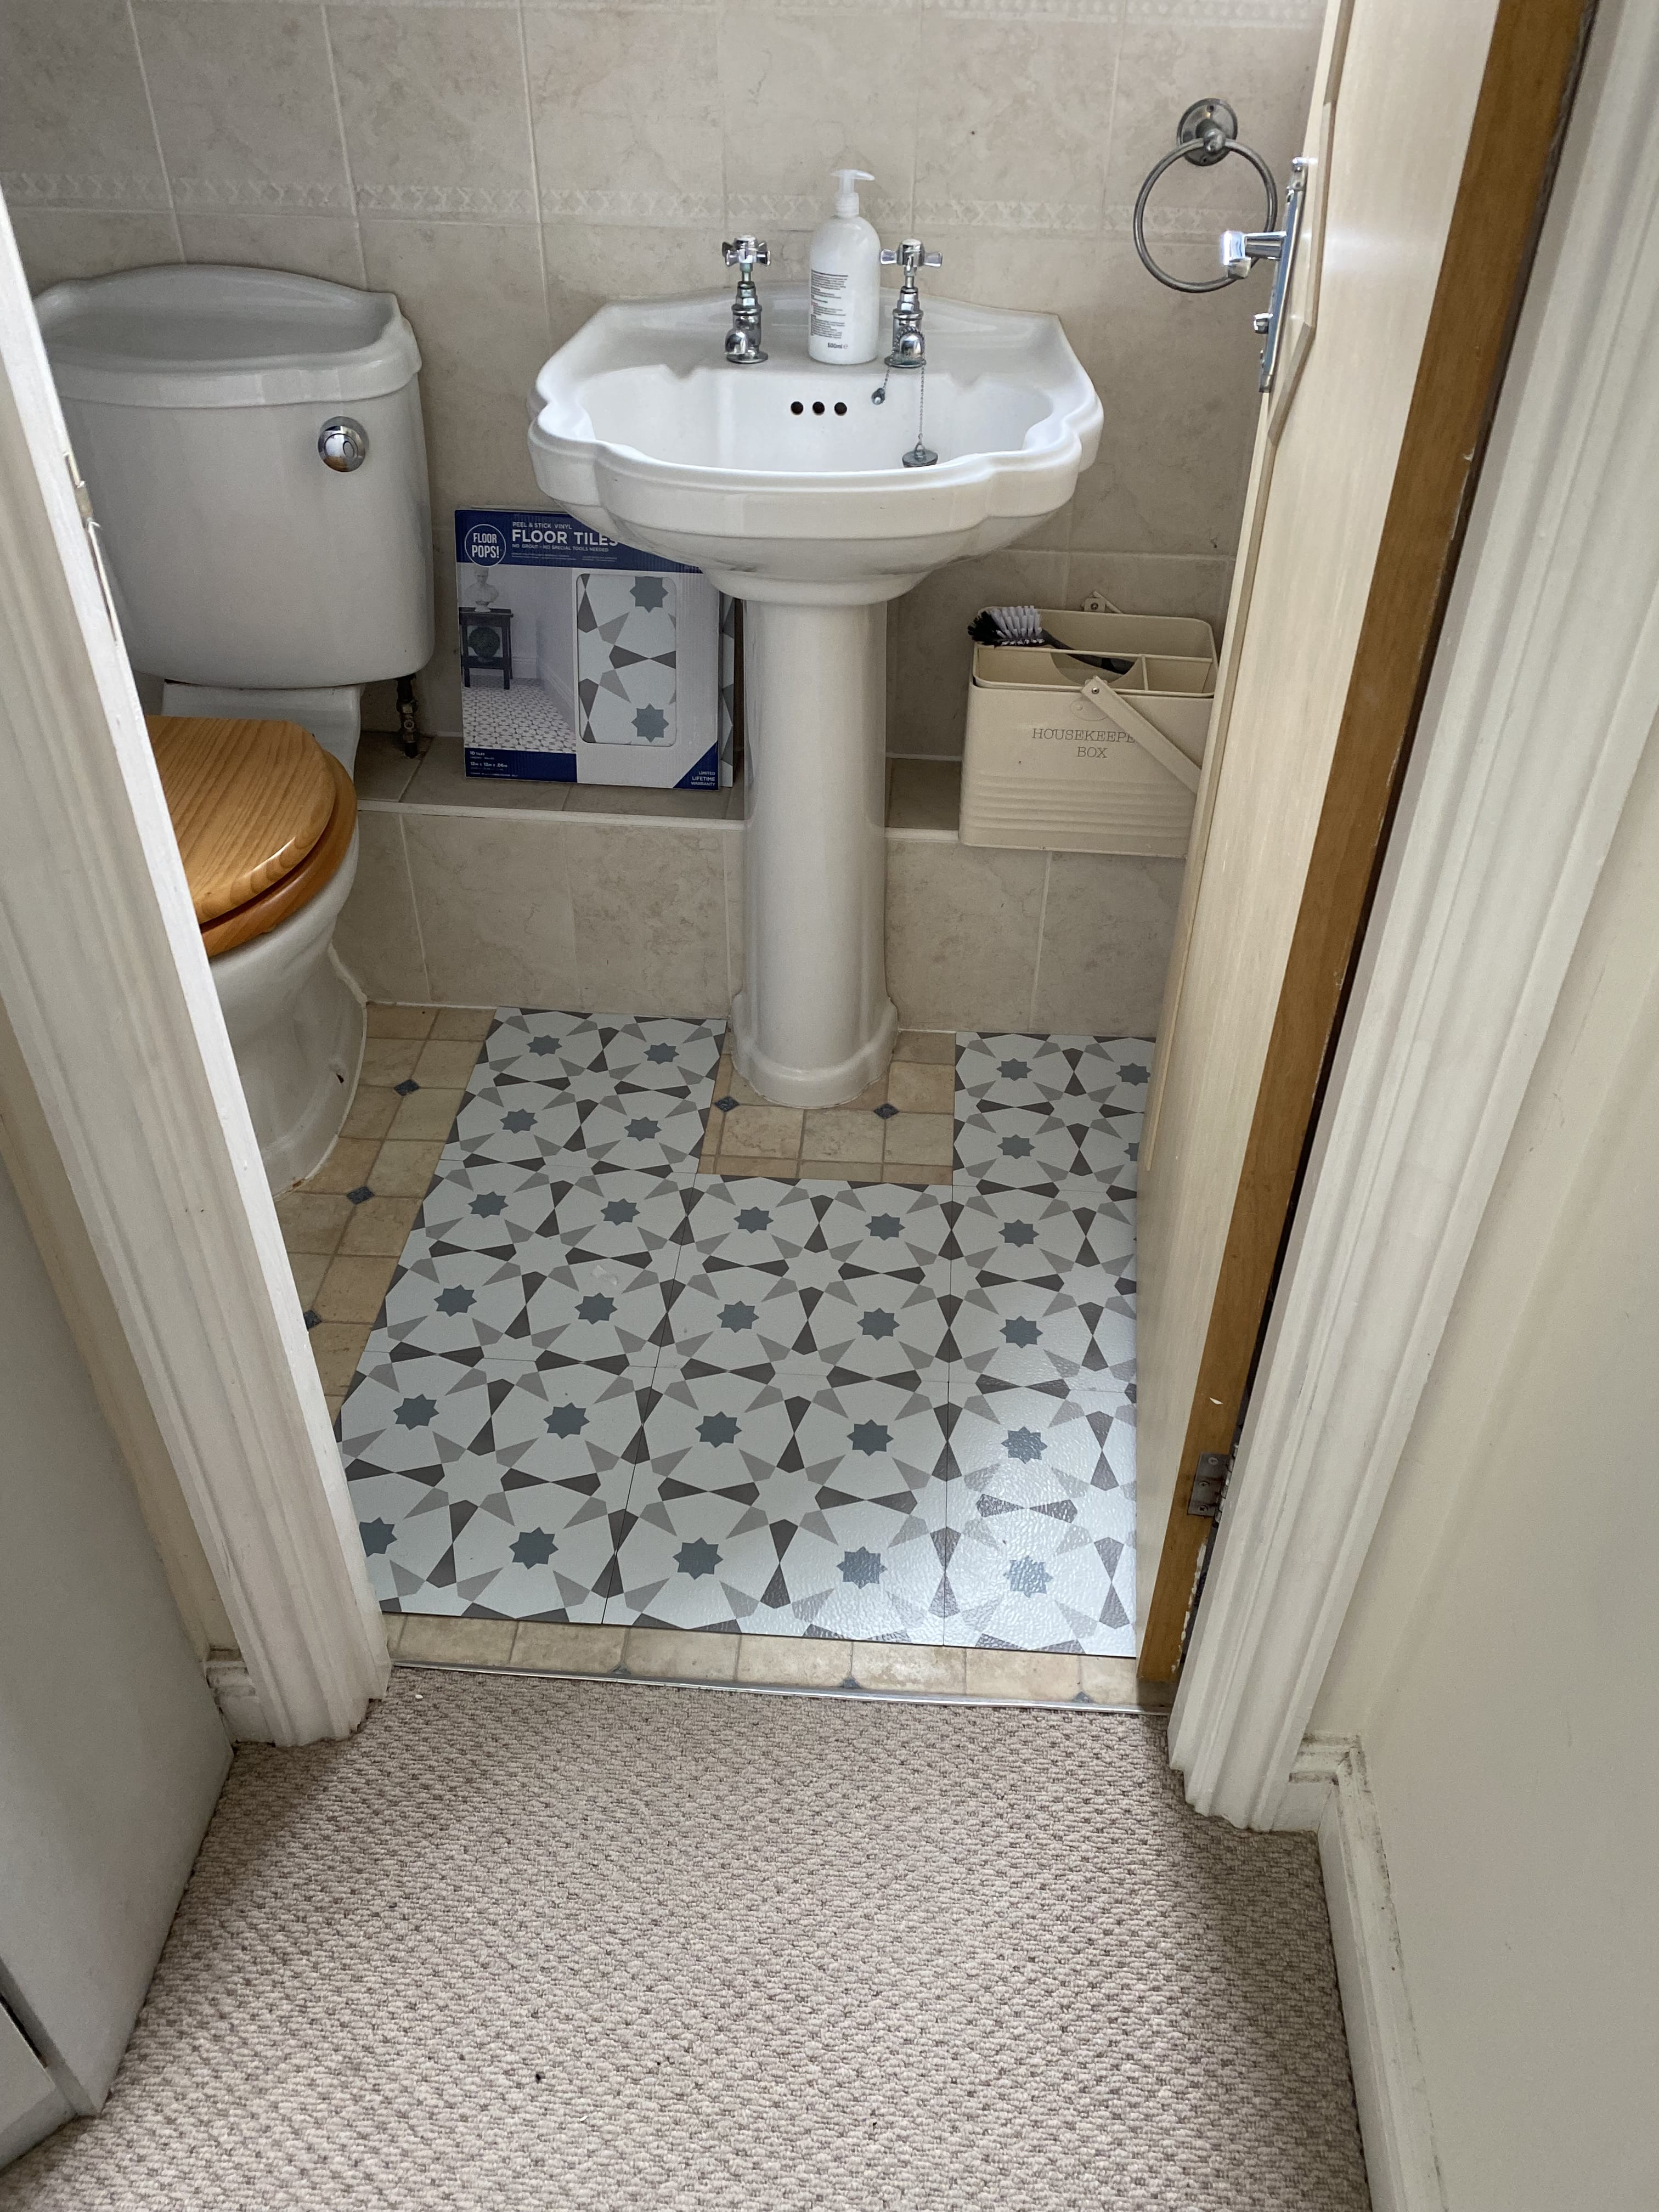
If you’ve had a read of my budget kitchen makeover from last year, you’ll know I’m a huge fan of vinyl floor tiles. They’ve completely transformed the floor in there, and are still in great condition two years on. So I knew I wanted to do the same in here, and fitted the tiles to the existing vinyl floor in here. I wrote a full DIY tutorial on how to lay peel and stick tiles which you can have a read of here, but it’s a really simple process anyone can do. I must admit this was slightly trickier in a bathroom, as it involved more cutting around sinks/toilets/radiator pipes, however it’s definitely worth it for the impact it makes. The other good thing about having such a small room is I only needed two packs of tiles to do the whole thing (there’s 10 tiles in a pack) - not bad for £25 though?!
This took me much longer to do than the kitchen, as being 8 months pregnant my back would only let me lay a few at a time, so I had to do it in a number of stages - however usually it’s a really quick process - the entire kitchen floor took me just an afternoon.
We had hardly any storage in here at all (a small awkward shaped space doesn’t work very well with lots of clutter!) so I knew I wanted a wall cabinet of some kind. I fell in love with this cane one from Dunelm, which is nice and slim for such a small room, but also surprisingly spacious, holding all our toiletries.
I was also faced with the blank back wall, which I wasn’t sure what to do with. I’ve added some cheap prints to create a bit of a feature, and fill that blank space which is visible with the door shut. I already had the frames laying around at home, so only needed to buy the prints, which were a complete bargain after scouring the internet for a discount code and coming up trumps with one for an epic 60% off. I'd always recommend having a search online for a code before buying anything - you can sometimes find one on a brand's social media too.
I was worried how the new dark paint might appear seeing as we get so little natural light in here, so added some soft lighting too in order to brighten things up. This beautiful glass light is from Dunelm, and we've placed above the mirror to give what was previously a very cold room some much-needed warmth.
Made some new bits/shopped my own home
Finally instead of ordering any more accessories, I used things I already owned and had around the house like these faux plants from Ikea (lack of natural light in here means most things won’t survive!).
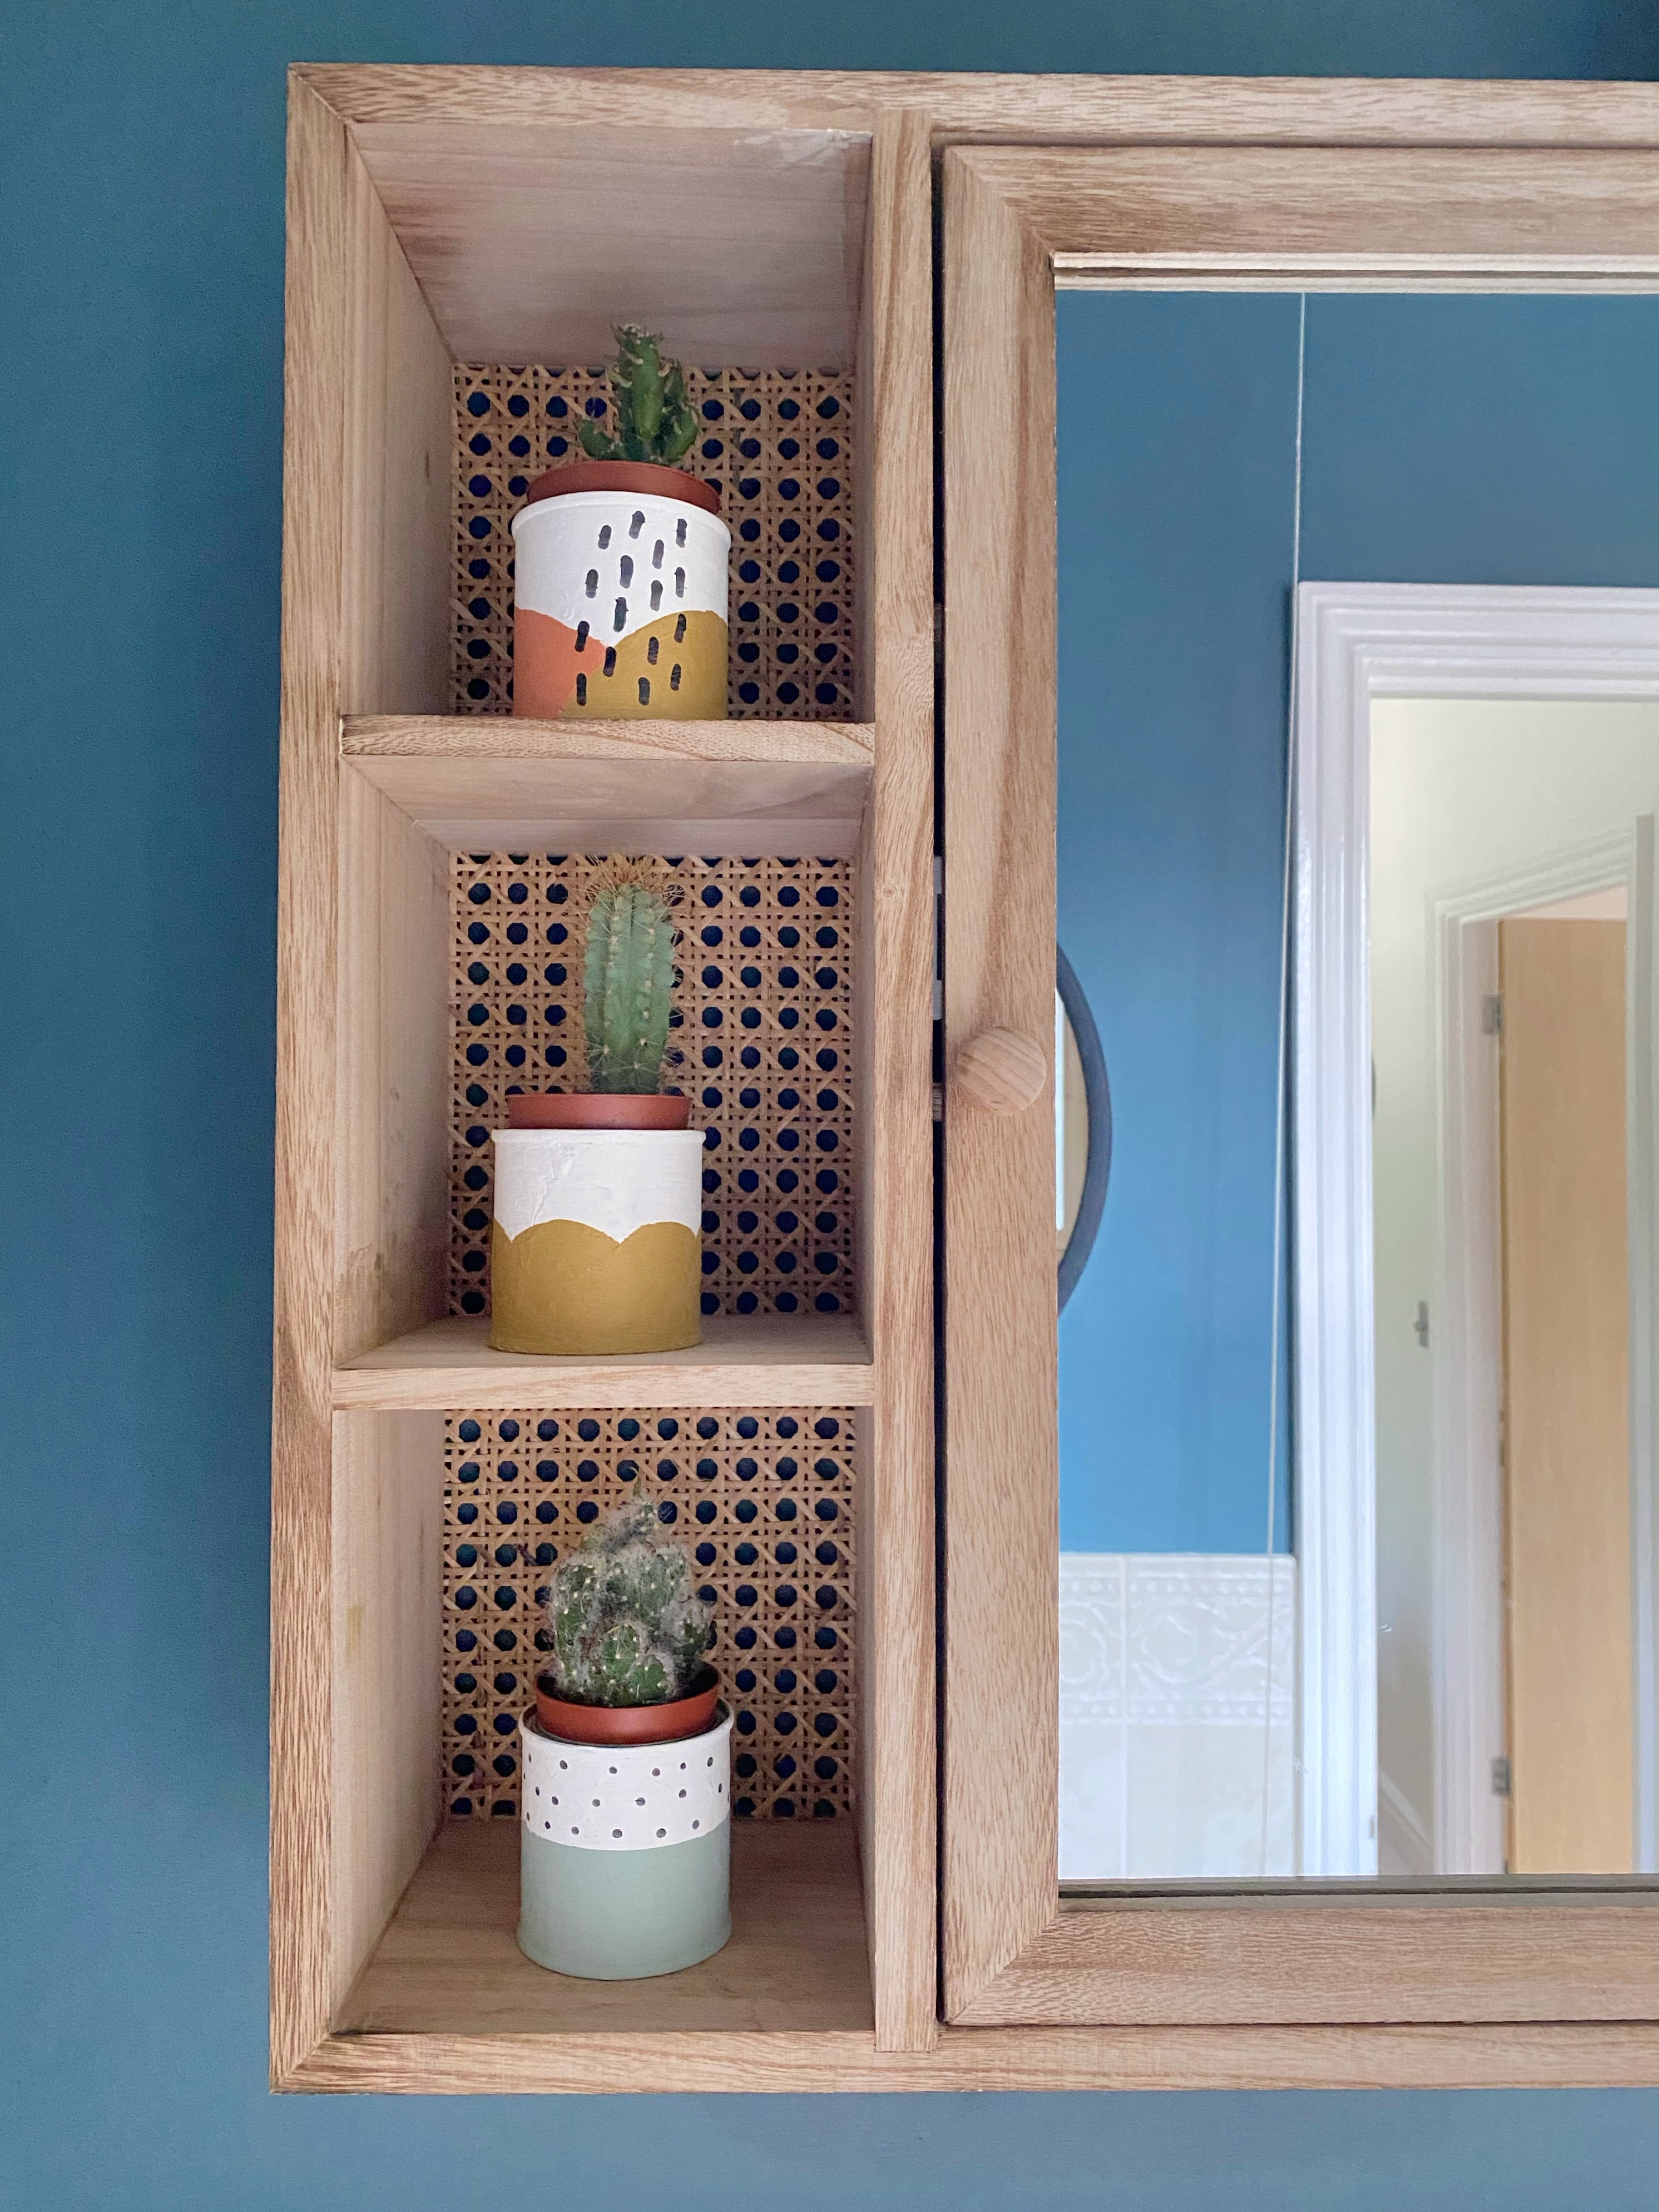
I also painted some old paint tester pots with chalk paint and added some hand drawn designs to create new homes for some cactuses. This is so easy to do, I've previously made pen and plant pots from coffee cans - I've shared the process in this blog post here.
I also painted some old paint tester pots with chalk paint and added some hand drawn designs to create new homes for some cactuses. This is so easy to do, I've previously made pen and plant pots from coffee cans - I've shared the process in this blog post here.
And that’s about it - how to give a boring, tired space a new lease of life without the need for any expensive renovations! Hope this has proved that you can still create a stylish space. wherever you live, even if you can't afford to replace any of the big things like tiles and fittings.
What do you think? Should have done this years ago, shouldn’t I?!
Thanks for reading,
Sam Xx
Thanks for reading,
Sam Xx
* = Affiliate Link


-min.png)

-min.png)


No comments
Post a Comment