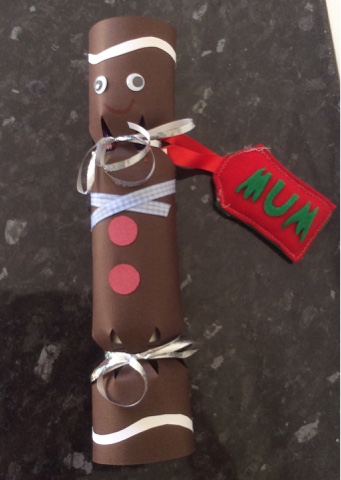
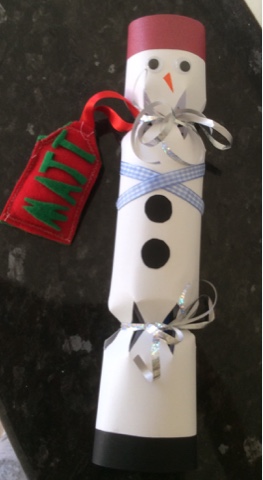
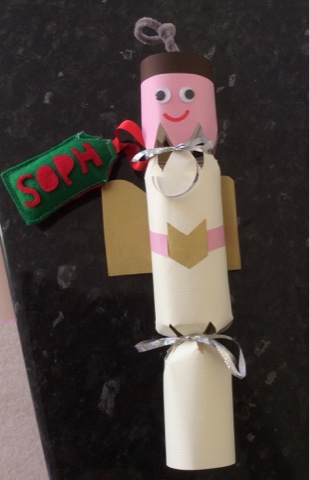
It's always been a festive tradition in my family that we have homemade crackers on our Christmas dinner table, and this year I decided to take it one step further and make some extra special ones I've designed in different Christmassy styles for my mum, dad, sister and husband.
You will need:
- Cracker template (I downloaded one from the December issue of Style at Home magazine)
- Coloured card (I picked mine up from Hobbycraft in red, black, white, brown and pink)
- Gold paper
- Pipe cleaners
- Cardboard tubes (I got a pack of 6 from Hobbycraft, but you could use empty loo rolls)
- Googley eyes (I found some in Hobbycraft)
- Cotton wool
- Pritt stick
- PVA glue
- Scissors
- Ribbon (if making a scarf for one of them)
- Lottery Scratch cards for each cracker
- Paper hats (I picked up a pack of 10 from eBay)
- Chocolate Santa (I found a pack of 5)
- Small present for each one (see below what I chose for my family - it was quite difficult to find things that would fit, but I went for a screwdriver for my dad, Emma Bridgewater hand cream for my mum, a backscratcher for my hubby and some nail varnish for my sister)
- Jokes (I printed my own - see below, but there's loads you can find on google)
- Pencil
- Ruler
For the tags:
- Coloured felt
- Cotton
- Cotton wool
- Ribbon
- Sewing machine (however hand stitching would work just as well too)
Method
1. Firstly, I decided on the design of each of my crackers. I was making four for my husband, sister, mum and dad so chose to make a snowman, angel, gingerbread man and Santa.
3. I then measured out a strip of black card to be the boots, and stuck it along the bottom of the red card, and did the same with a slightly thinner piece to create a belt, which I stuck across the middle.
4. I then cut a square of gold paper to create the belts clasp
5. Measure a strip of pink card and stick on the top third of the cracker to create santas face and stick two googley eyes on
6. Above the pink strip, stick small bits of cotton wool to create the edge of a hat
7. Once everything has dried, turn the card over and cover the back with PVA glue, then stick a cardboard tube in the centre
8. Wrap the card around the tube. This is quite tricky, and you might need to hold it in place for a couple of minutes until dry
9. I then pushed a hat, scratchcard and homemade joke (I googled Christmas jokes, and printed them out) into the roll, as well as a small present and a chocolate Santa
10. Once everything is securely inside the roll, twist the ends and secure with a piece of ribbon tied into a bow
11. You might need to secure with a piece of tape
12. I also added a personalised gift tag, using felt sewn together and filled with cotton wool. I sewed these using a sewing machine, however you could hand stitch too. I added a piece of ribbon and attached these to the top ribbon.


No comments
Post a Comment